
Splatter Nail Design Tutorial
One of the most famous nail design techniques being done by many women out there is the splatter nail artwork.
Splatter technique is actually quite simple to do, though the finished item may look so complicated. Below, we’ll teach you how you can do splatter nail design.
Materials Needed:
Paper plate
Base Coat
Straws
Nail Polish (different colors of your choice)
Scotch tape
Polish Remover

How to:
Prep: Place scotch tape around your nails to shield your skin from splatters. This is not a required step, but it surely quickens the clean-up procedure after you’re done!
It’s also advisable that you cover your workspace with newspaper because this can get a little messy.

- Paint your nails with two coats of base color. Use white or any light-colored base color.
- Pick 2-4 splatter colors and put a tiny pool of the darkest one on a paper plate. Dip the end of the plastic straw into the color and position it over one of your nails. Blow into the other tip of the straw so that the polish splatters onto your nail.
- Do it again on all of your fingers, and let the first color dried out a bit before starting up on the next lightest one. If you don’t allow it to dry at least a little, the colors will certainly blend and run with each other, which produces a muddier result.
- Soon after you have splattered all the colors, let dry and use a clear top coat.
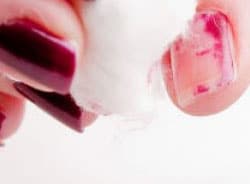
- Use a cotton swab dipped in a polish remover to eliminate any unnecessary splashes that could have gotten on your fingers.